How to Use Precision Adjustment
When using “Print Then Cut”, if the actual cutting path is shifted up, down, left, or right from the printed design, you can use “Precision Adjustment” to correct it.
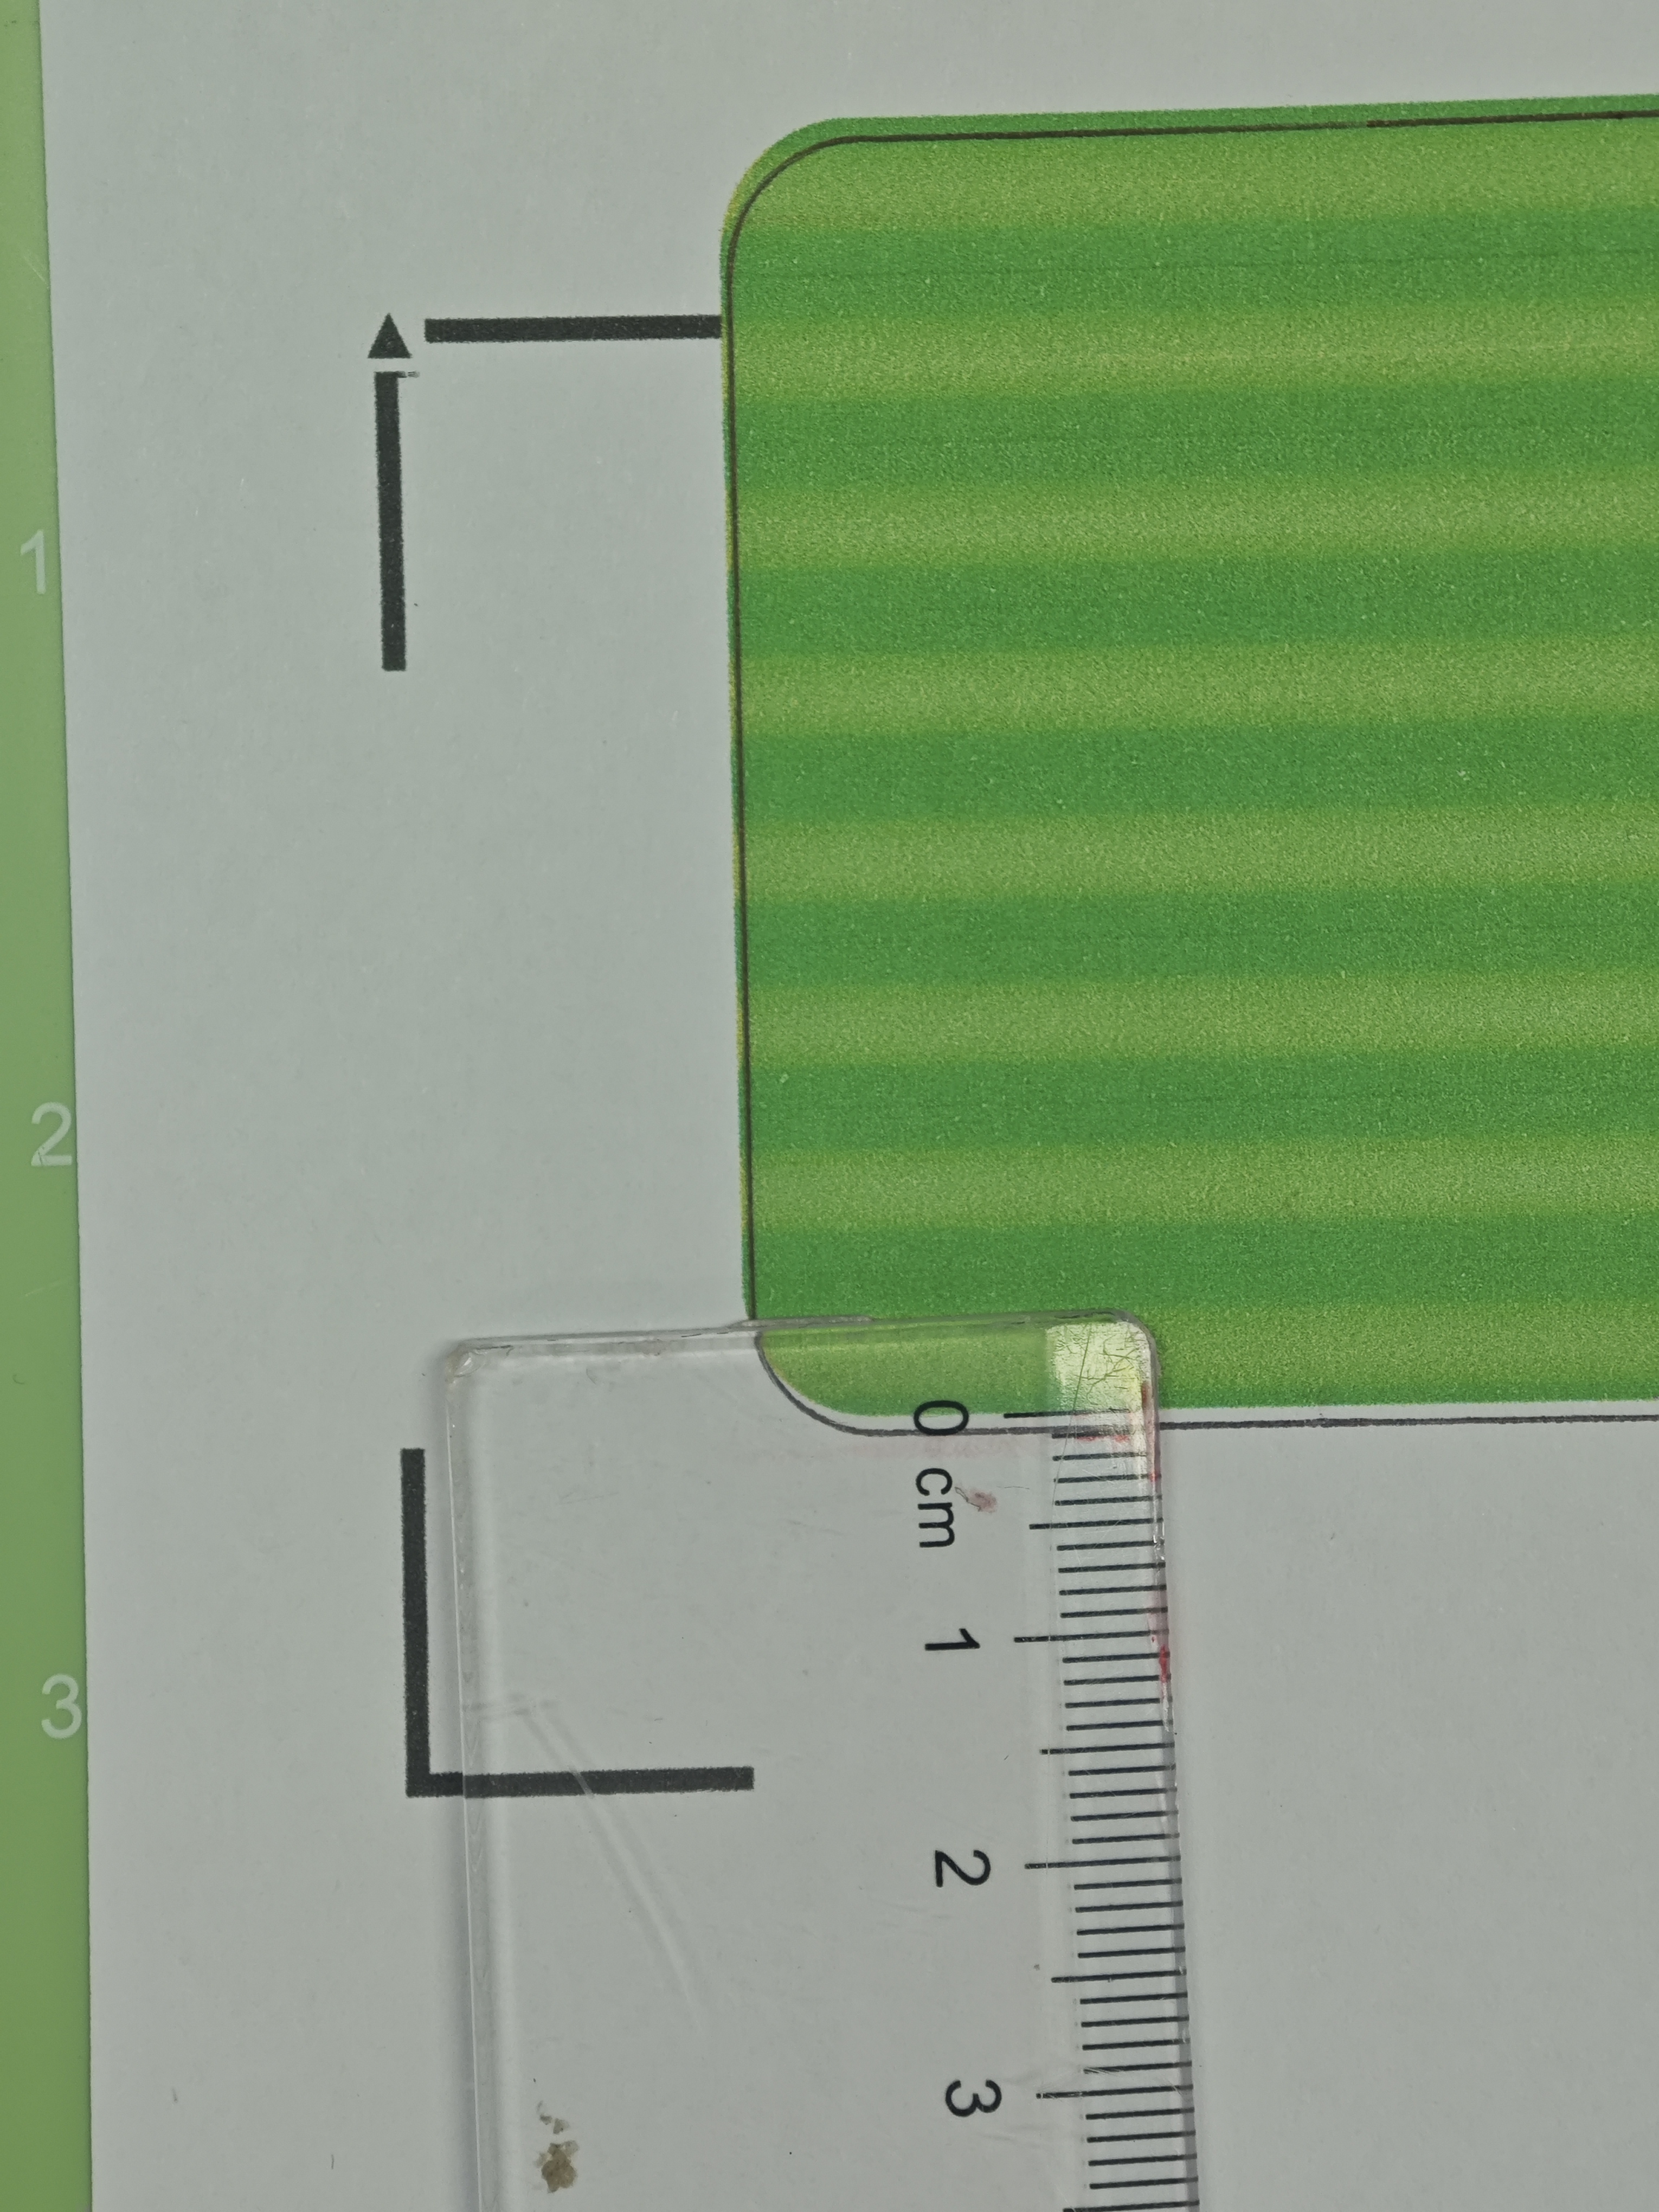
As shown above, the black line represents the actual cutting path. After measuring it, you can see that the cutting path is shifted 1mm downward from the design, so the cutting position needs to be adjusted upward by 1mm.
Tip: Each tap on a direction button adjusts the position by 0.1mm, up to 1mm. If the actual cutting position is shifted upward, adjust it downward. If it is shifted left or right, adjust it in the opposite direction as well.
Steps
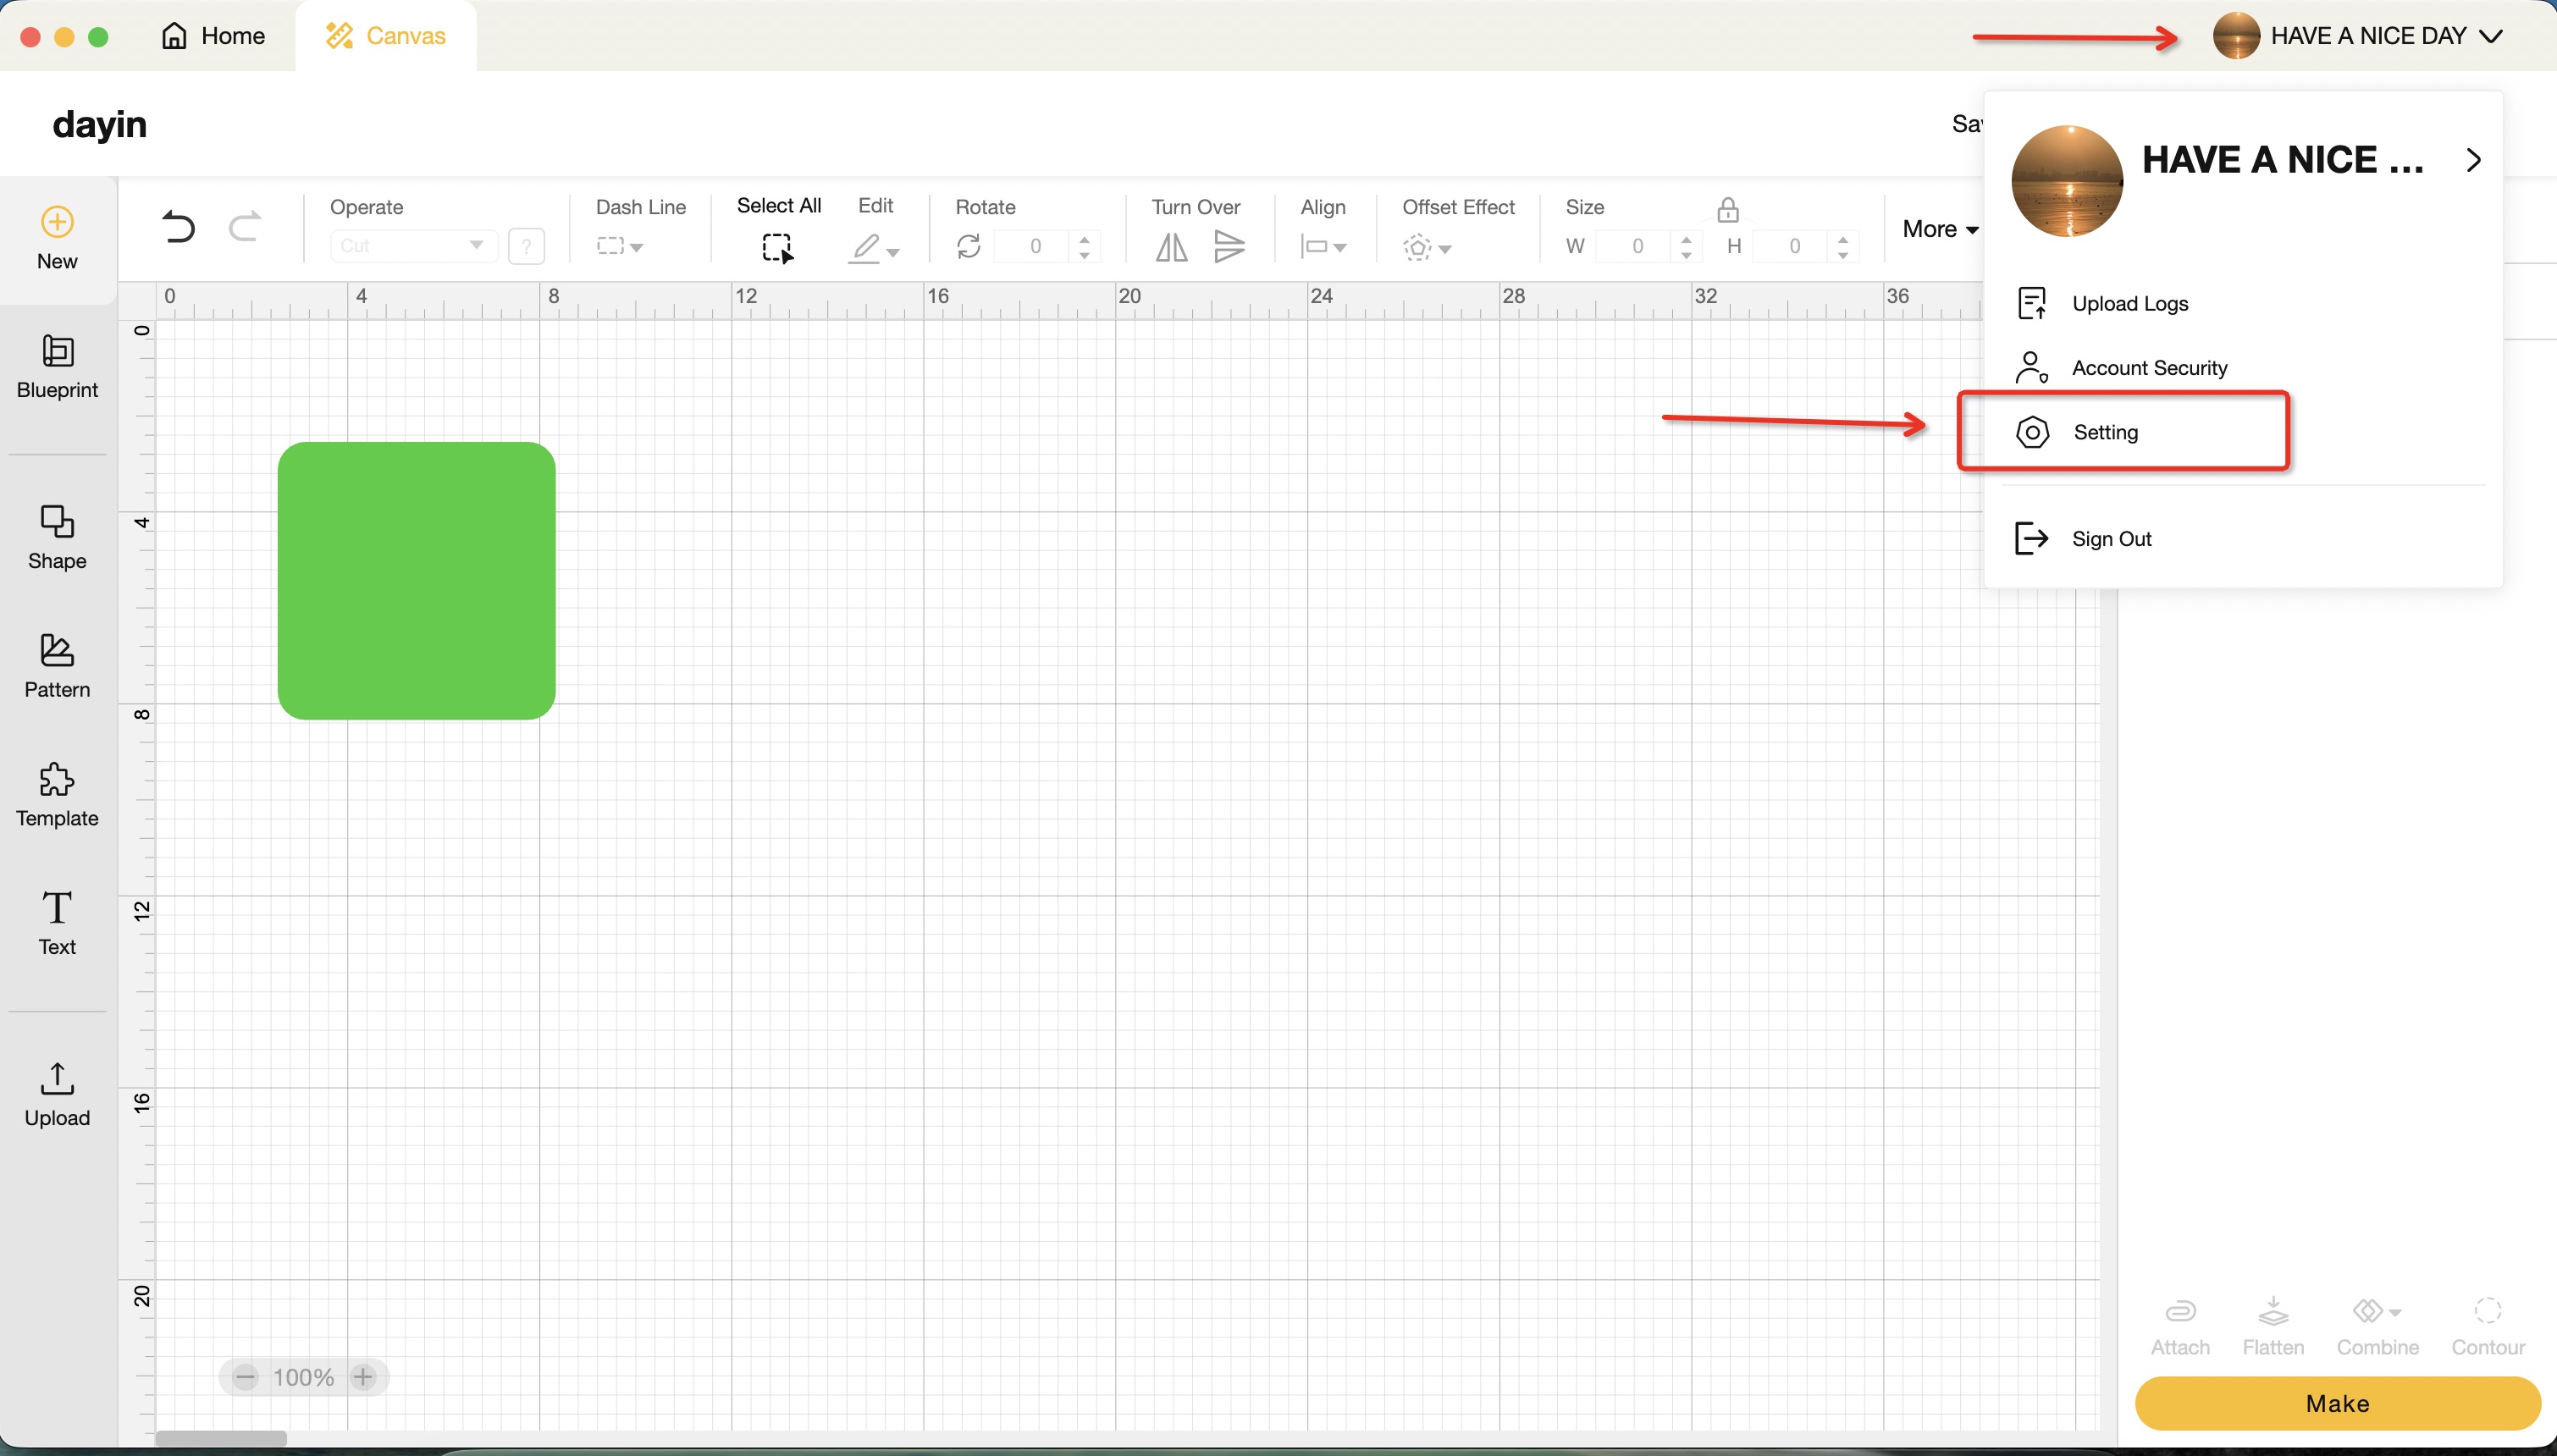
- After connecting the machine, go to “Settings”
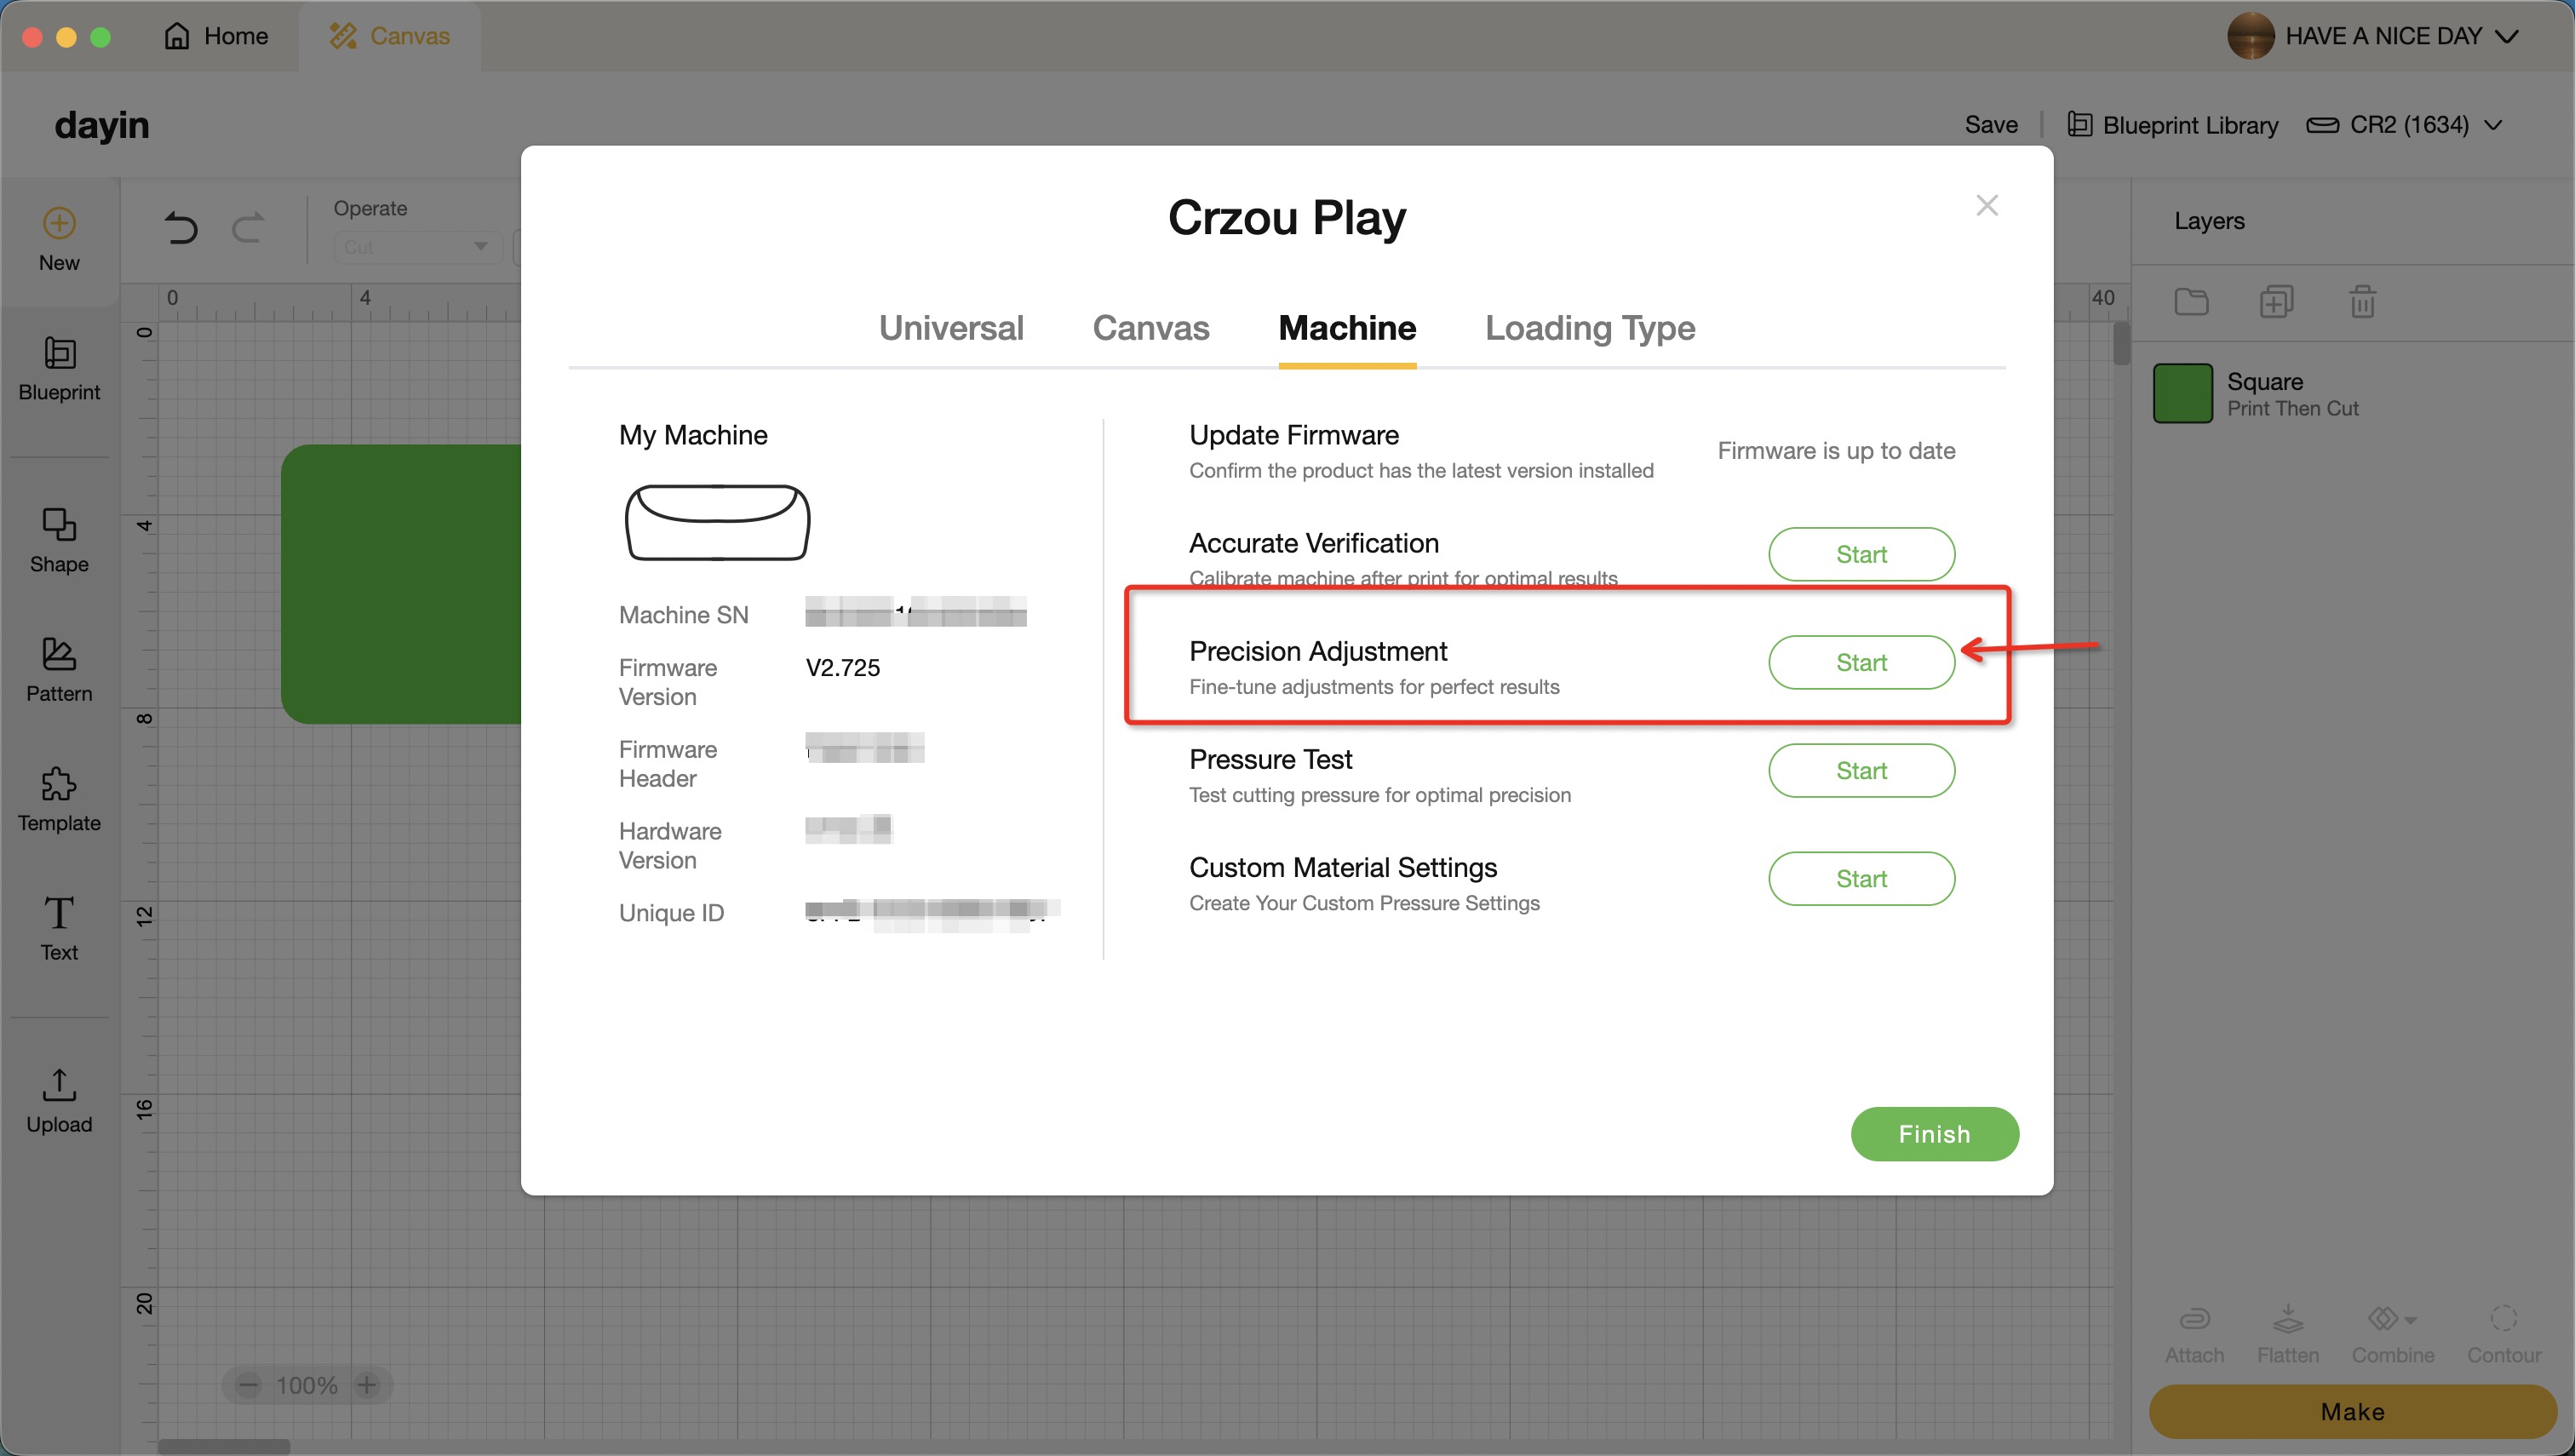
- Select “Machine”, then tap “Precision Adjustment”
- If the actual cutting position is 1mm below the design, adjust it upward by 1mm
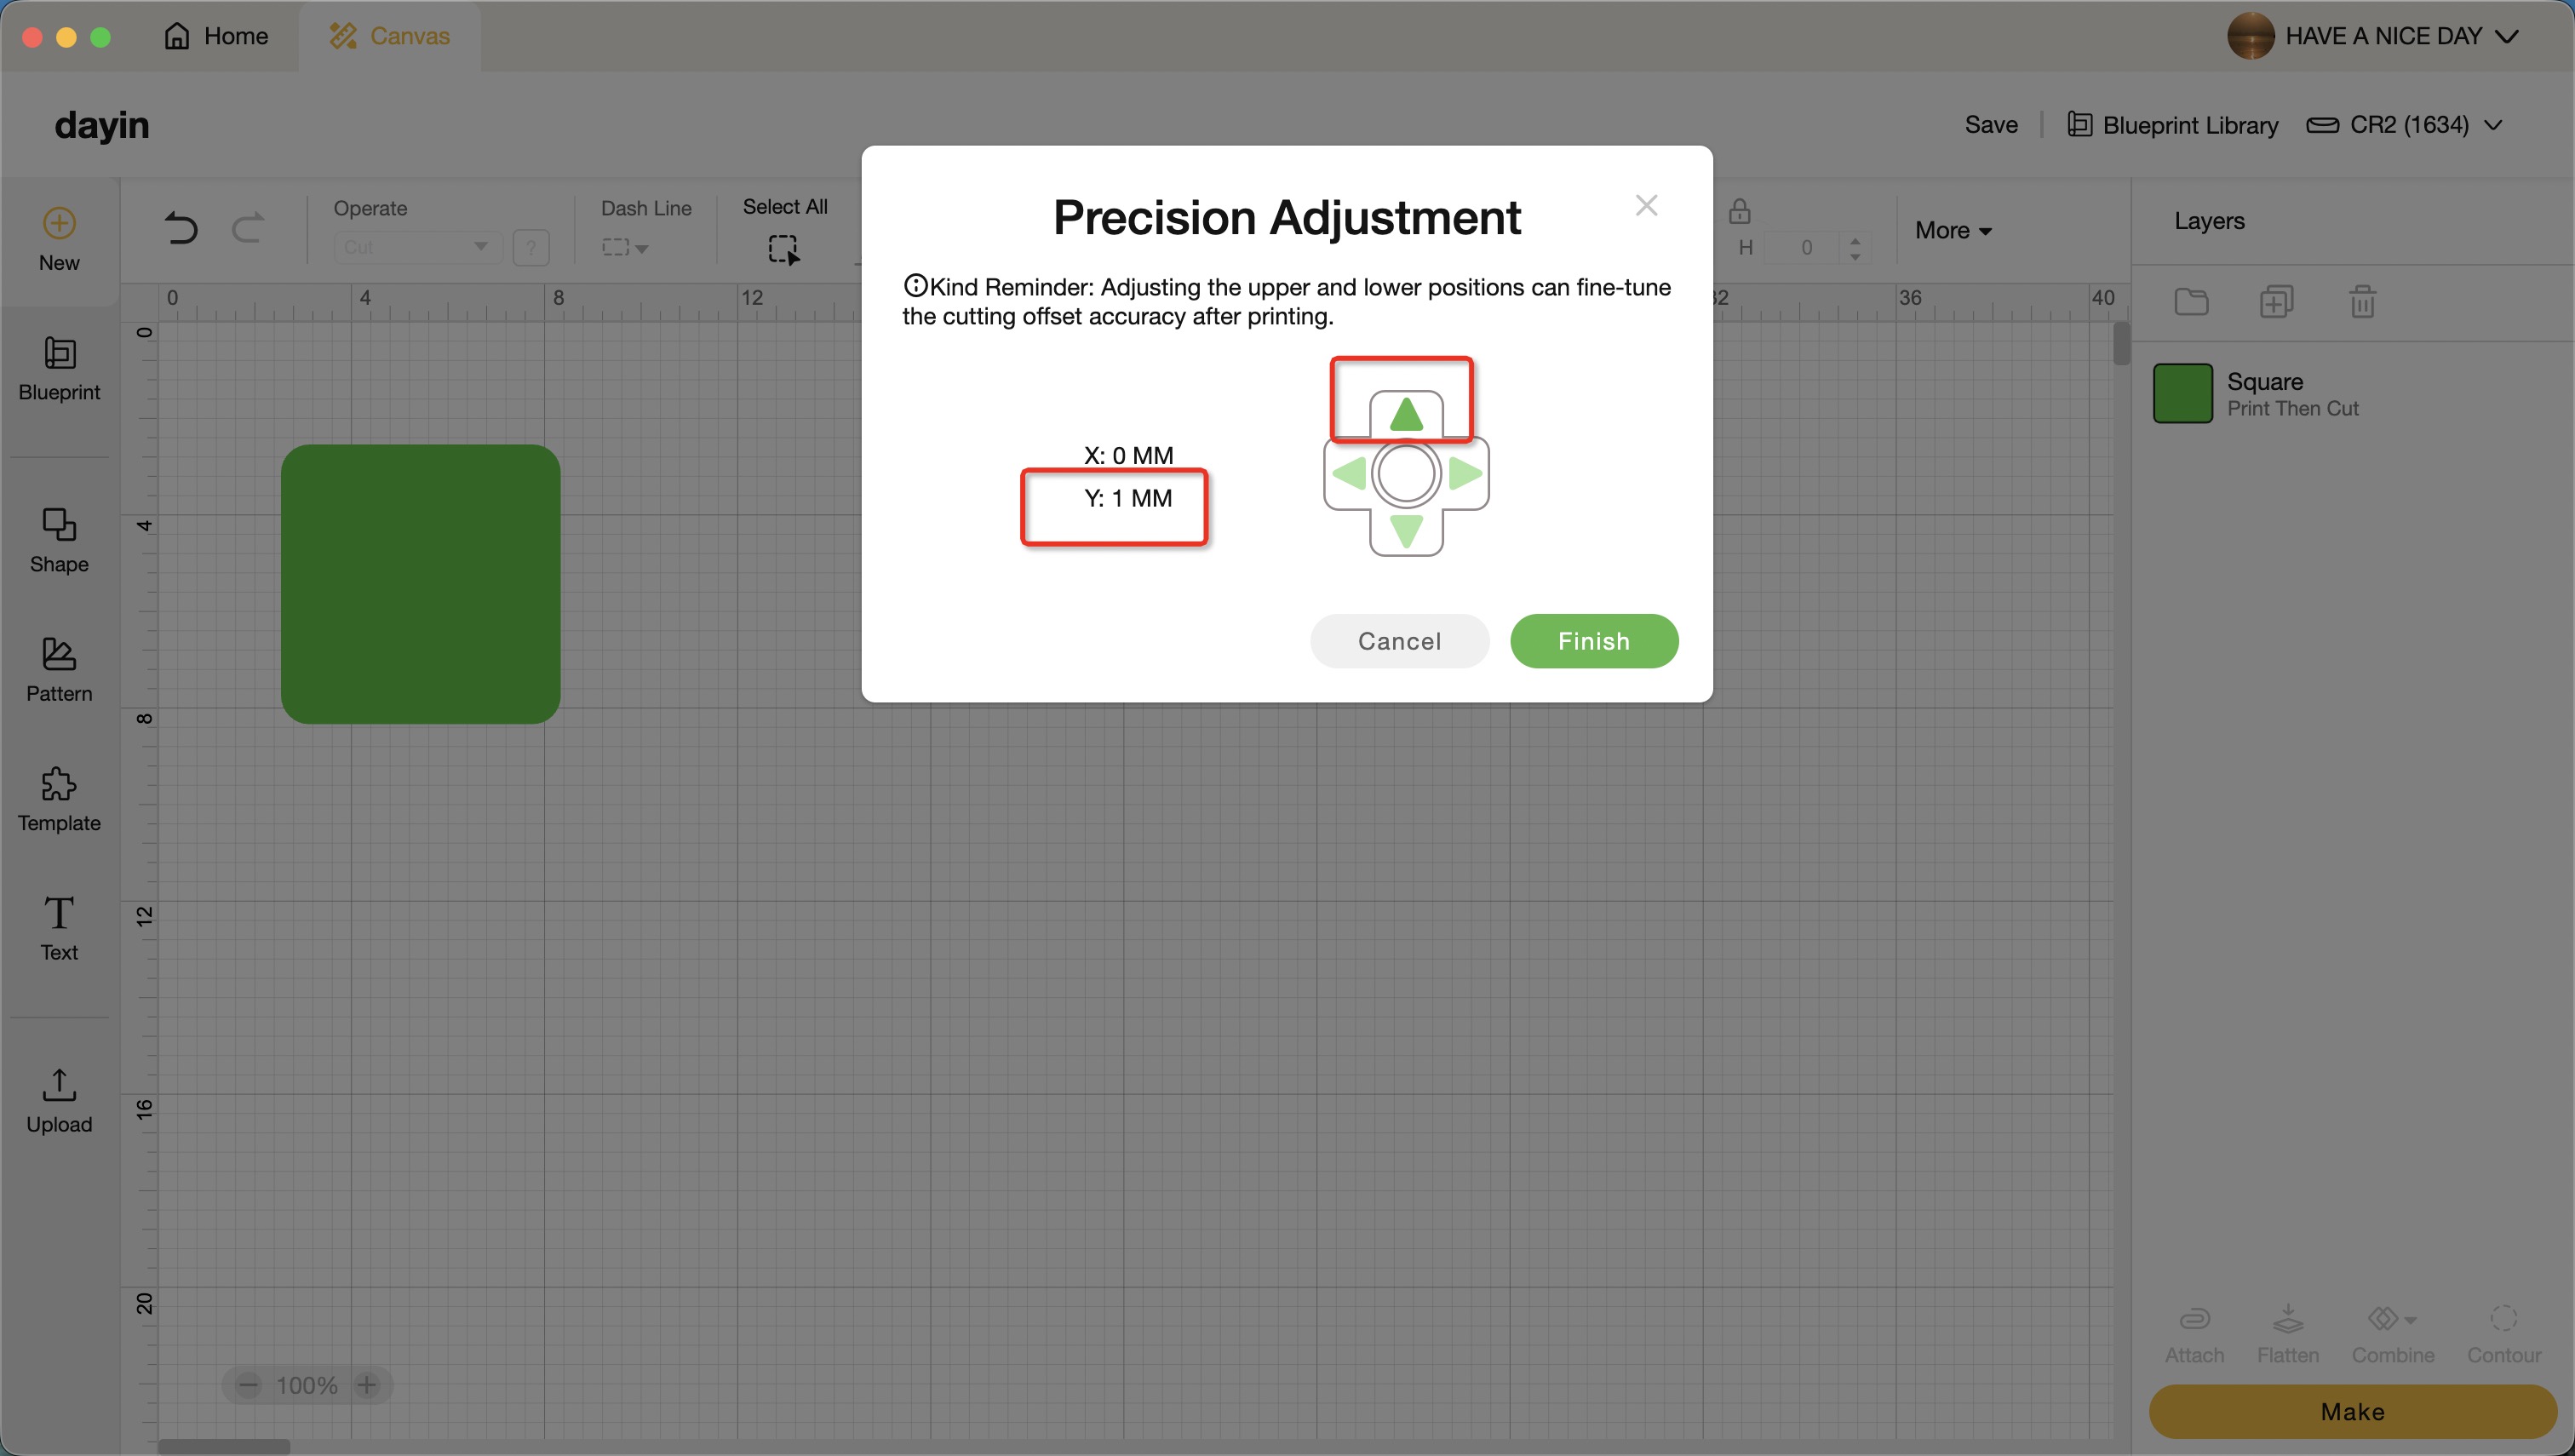
- Tap “Finish” to save the setting, then run “Print Then Cut” again to check the result